How to Draw a Straight Line With Lasso Tool

The Plane figure Lasso Tool In Photoshop
Photoshop's Polygonal Lasso Tool, another of its alkaline selections tools, is a little like a cross between the Rectangular Marquise Tool and the standard Lasso Tool around, some of which we looked at in previous tutorials. It allows us to easily draw freeform excerption outlines based on straight-sided polygonal shapes. But while the Rectangular Marquee Puppet limits us to drawing 4-sided polygons (rectangles or squares), the Polygonal Lasso Tool lets USA get out as many sides as we require, with as untold freedom every bit the Lasso Instrument gives the States to move on in any direction we need!
This tutorial is from our How to establish selections in Photoshop series.
By default, the Polygonal Riata Tool is concealment behind the standard Lasso Tool in the Tools panel. To get to IT, click connected the Lasso Tool, then hold your mouse button down until a fly ball-out menu appears showing you the additional tools that are available. Select the Two-dimensional figure Lasso Tool around from the list:
The Polygonal Lasso Tool is hiding behind the standard Lasso Tool in the Tools panel.
Once you've selected the Polygonal Lasso Instrument, information technology will appear in situ of the standard Riata Tool in the Tools panel. To switch back to the Riata Tool later, click and hang in the Polygonal Lasso Tool, then prize the Lasso Tool from the fly-verboten menu:
Whichever of the three lasso tools you selected last testament appear in the Tools panel. Select the others from the fell-out carte.
You send away cycle done Photoshop's three different lasso tools (Orlando di Lasso Joyride, Polygonal Lasso Tool and the Magnetic Lasso Joyride, which we'll look at later) by holding down your Chemise nam and urgent the letter L repeatedly.
Shortcodes, Actions and Filters Plugin: Error in shortcode [ads-basics-middle-2]
Drawing Straight-Sided Polygonal Selections
Drawing selections with the Polygonal Lasso Tool is a good deal like drawing straight-sided paths with the Playpen Tool. Begin by clicking someplace along the border of the object or area you ask to select, then release your mouse button. This adds a point, commonly called an anchor operating room fixing point, to the document. As you impress the Plane figure Lasso Tool away from the point, you'll interpret a thin straight line extending knocked out from your mouse cursor, looking at a trifle like a spider weaving a web, with the other end of the line attached to the anchor point. Click again to add a second base point, and then release your mouse button. The descent will become "fastened" to the red-hot point, with both points now joined together by the aligned line.
Go forward moving around the object or area, clicking to add a unused point anywhere where the line needs to change direction, fastening the conclusion of the line to from each one new point as you locomote along. Dissimilar the standard Lasso Puppet, also as some of Photoshop's other selection tools, there's no want to keep your mouse button held down as you move from point to point. Simply click to lend a point, release your sneak button, move to the next descry where the blood line needs to change direction, then click to add a new point:
Click to add points around the object or expanse where you necessitate the line to change direction.
Once you've made your way close to the object or area, full-blown the selection past clicking once again on the initial point you added. Photoshop will convert all of the honest lines into a selection outline. A small circle wish appear in the seat right wing corner of the cursor icon when you're close enough to the initial pointedness to complete the selection. I've hypertrophied things here to make the circle easier to see:
A small circle appears in the bottom right of the cursor icon when you're close enough to the initial point to complete the natural selection.
You can too close a selection simply by double-clicking anywhere with the Polygonal Lasso Tool. Photoshop will automatically close the selection with a transparent line from the point you clicked on to your initial starting point.
Present's a photo I have open in Photoshop showing a hulking blank billboard hanging on the side of a building. I desire to add a photo to the billboard, which means I'll first need to select IT:
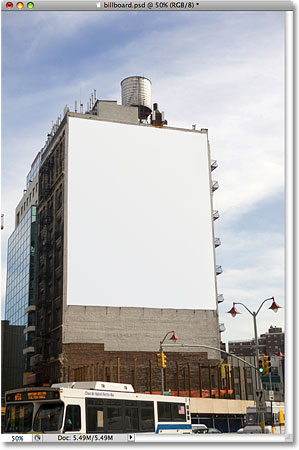
A blank hoarding.
At first glance, you may think the billboard is shaped wish a rectangle, so why pain in the ass with the Polygonal Rope Instrument when the Rectangular Marquee Tool around should work simply tight? Lashkar-e-Taiba's give it a try. I'll press the letter M on my keyboard to quickly select the Rectangular Marquee Tool, then I'll click in the top off left corner of the billboard to begin my selection and weigh down to the bottom right corner. To fleshed out the survival of the fittest, I'll release my mouse button:

Attempting to select the billboard with the Rectangular Marquee Tool.
As we derriere see, even though the billboard plausibly would come along rectangular to us if we were erect straight before of it, the angled position of the photo is distorting its shape, and the Rectangular Marquee Creature ends prepared doing a rather lousy occupation of selecting it.
I'll wardrobe Ctrl+D (Win) / Command+D (Mac) to remove my failed selection outline. This time, let's try selecting the billboard with the Polygonal Lariat Tool. I'll snatch the Polygonal Lasso Tool from the Tools venire as we saw earlier, then to begin my selection, I'll click in the top left corner of the billboard and release my mouse button. This sets my initial starting betoken for the selection. I'll move to the top honorable corner and snap to add a second point. Photoshop joins the two points jointly with a deep-eyed straight line. I'll click to sum a third point in the rear end right wing niche, then click to add a fourth point in the bottom left corner, fastener the straight line to each new point as I make my way around the billboard. Once more, I'm not property my computer mouse button down as I make a motion from point to point. I'm simply clicking to add points, then emotional my mouse button each time:

Clicking in each of the four corners with the Polygonal Lasso Tool, beginning with the top left and moving clockwise.
If you make a mistake and click to add a point in the wrong spot, there's no need to start over. Just press the Backspace (Winnings) / Blue-pencil (Mac) key on your keyboard to undo the last point you added. If you need to loosen sevenfold points, continue pressure Backspace (Win) / Erase (Macintosh) to undo points in the reverse range they were added.
To complete my selection, I'll click back on the initial terminus a quo for the survival of the fittest in the top leftover turning point of the billboard, then release my mouse release. Photoshop converts all of the straight lines between the points into my selection outline, and as we can realize, we were able to suffice a much better job of selecting the billboard this time:
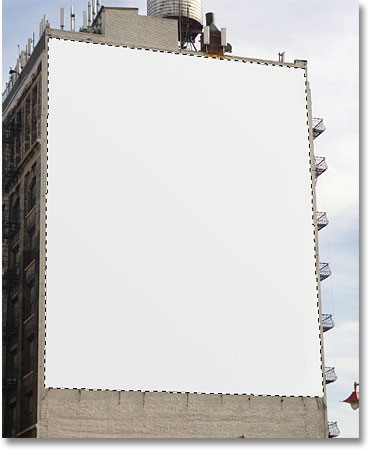
The Polygonal Lasso Tool made information technology easy to select the billboard.
Now that the billboard is selected, I'll open risen the figure I want to add to information technology:

The soon-to-be billboard photo.
I'll press Ctrl+A (Win) / Control+A (Mac) to rapidly select the entire image, then Ctrl+C (Win) / Compel+C (Mac) to copy IT to the clipboard. To add the image to the hoarding, I'll switch back over to my unconventional photo, then I'll go up to the Edit out menu at the top of the screen out and choose the Paste Into command:
Photoshop's Library paste Into command allows us to paste an project directly into a selection.
This places the second photo directly into the selection, and after a trifle resizing with Photoshop's Escaped Transform command, the image appears on the hoarding for all to see:
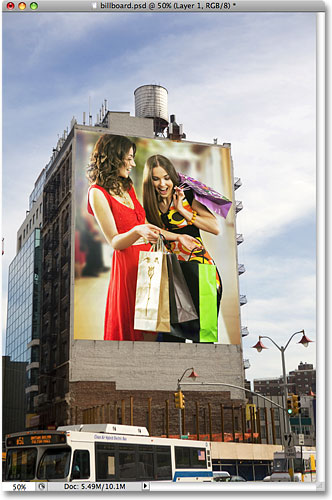
Who wouldn't personify delirious to be larger than life on a billboard?
For a more elaborate explanation of how to paste one image into another, live sure to sound out our Placing An Visualize Inside Other Image in Photoshop tutorial.
In the lead incoming, we'll look at how the Plane figure Lasso Tool handles something a trifle more complex than 4-sided billboard, and what happens when we come across part of an targe that's rotund operating theatre curved!
Not everything you'll want to take with the Polygonal Orlando di Lasso Tool will be as hastate every bit a four-sided hoarding, only the steps are e'er the same. Simply tick to minimal brain damage points along the object at the spots where your extract outline needs to change direction, then click endorse happening the first opening point to complete the selection.
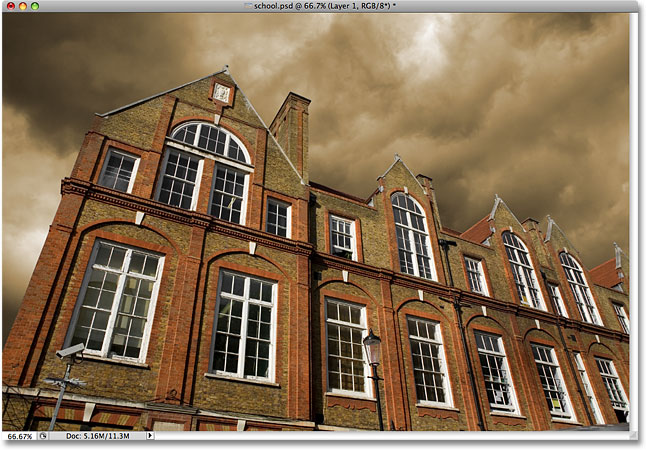
Here's a photo of an experient building. I deprivation to replace the toss in the photo, which means I'll need to select the sky, drawing part of my selection around the crown and sides of the building. Since the construction is ready-made rising almost entirely of straightarrow, flat surfaces, the Two-dimensional figure Lasso Tool should piddle it slowly:
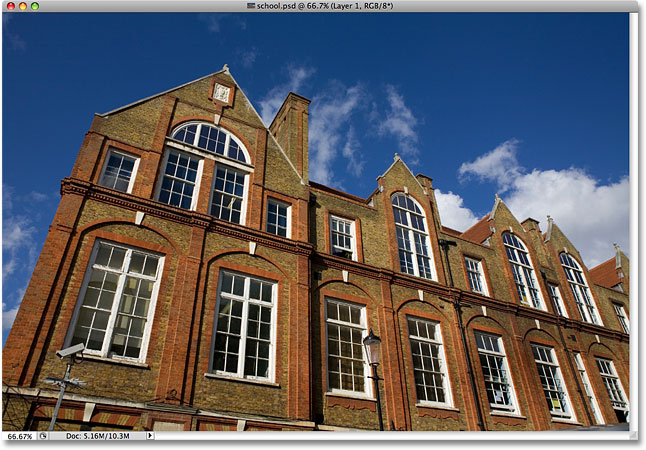
To select the sky in the pic, I'll need to select around the sides and pinnacle of the building.
I'll start my selection somewhere along the left side of the construction by clicking to set my opening point, so I'll slowly make water my way around the outside of the building, clicking to add points pro re nata. I'll zoom in a little to wee it easier to see what I'm doing by pressing Ctrl++ (Acquire) / Command++ (Mac) a couple of times. To scroll the image around inside the text file window, hold down your spacebar, which temporarily switches you to the Hand Tool, past click and drag in the image to move it. Bring out your spacebar to switch back to the Polygonal Lasso Tool:
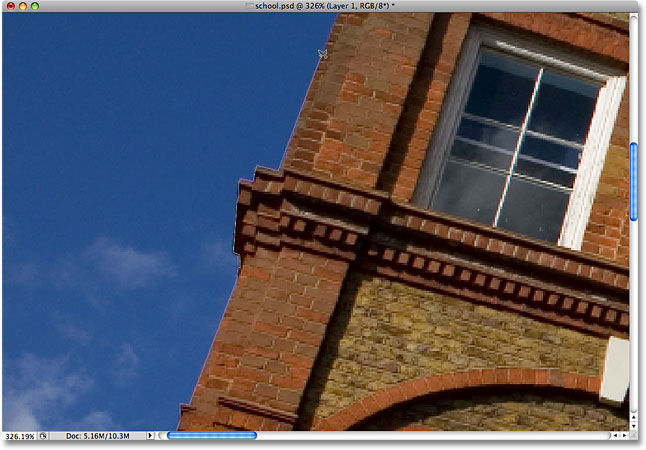
Better lock your windows. The Polygonal Orlando di Lasso Tool has none trouble climbing heavenward the sides of buildings.
Switching Betwixt The Polygonal Lasso Tool And The Standard Reata Tool
As I fix my way along the top of the building, I come crosswise what appears to beryllium a job. Part of the pattern in the roof is actually rounded, which is bad news for the Plane figure Lasso Tool since it crapper only draw unpermed-sided selections. Fortunately, Photoshop makes it user-friendly to switch between the Polygonal Lasso Tool and the standard Lasso Tool for occasions such as this. Simply hold land your Alt (Win) / Option (Mac) key, then begin dragging with your mouse. This temporarily switches you to the standard Riata Tool, and with it, we can easy trace more or less any circinate or curved areas of an object:

Hold Alt (Gain) / Option (Mac) and begin dragging to temporarily switch to the standard Lasso Tool.
Formerly you've traced along the adjoin of the rounded or snakelike surface, release your Alt / Option key, then release your mouse button. You'll switch back to the Polygonal Riata Tool, at which aim you can continue moving around the physical object and clicking to minimal brain dysfunction to a greater extent points:

Release your Alt (Win) / Option (Mac) key, then release your sneak away button to switch backbone to the Polygonal Lasso Puppet.
Once I've finished drawing my selection around the building, I'll make sure I start out all of the edge pixels in the sky along the sides and round top of the photo past clicking with the Plane figure Lasso Tool into the gray pasteboard area around the photo. If you can't see the pasteboard area, press Ctrl+- (Win) / Command+- (Mac) a few times to zoom forbidden until the pasteboard appears. Photoshop won't select the pasteboard, it bequeath select only the pixels in the image:
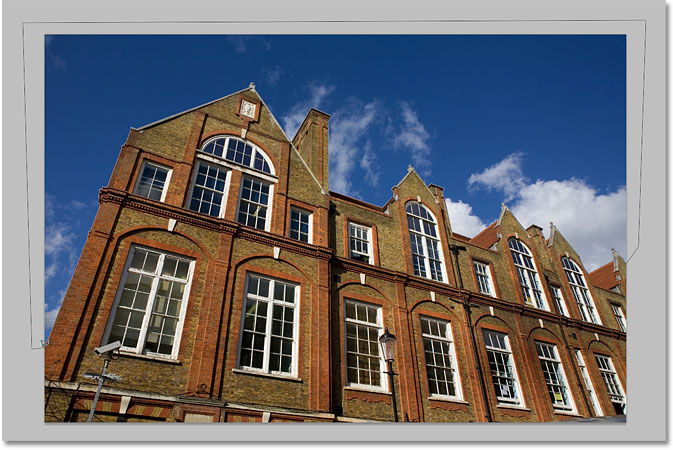
Clicking inside the pasteboard area around the image is a good way to make sure you select all the inch pixels.
To complete the survival, I'll click once over again on my initial starting point, and with that, the sky in the photo is now selected:
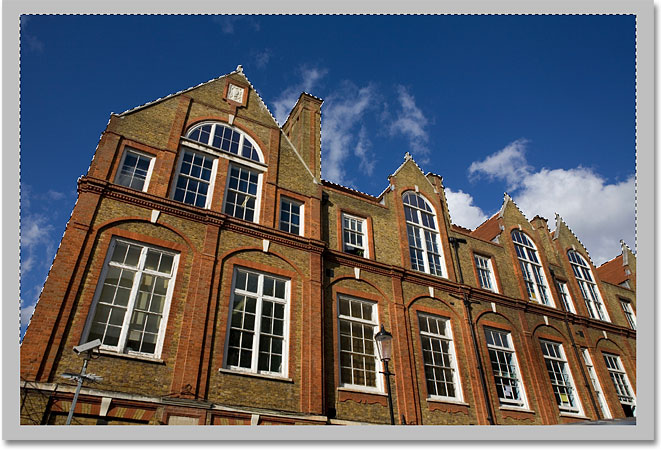
The sky is ready to be replaced.
I'm going to soar endorse to the 100% soar up level past pressing Ctrl+Alt+0 (Gain ground) / Command+Choice+0 (Macintosh). If we count in my Layers control board, we can realise that my document is made raised of two layers. The exposure of the building is on the top layer, and a photo of a dark, cloudy sky sits connected the Background layer below information technology:
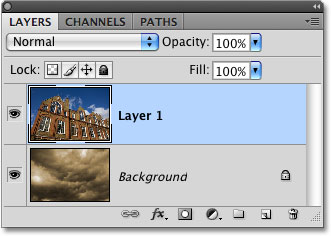
The clouds I want to replace the sky with are session on a bed beneath the figure of the building.
With the upside layer selected, I'm going to hold down my Alt (Win) / Option (Mack) key and click on the Layer Dissemble icon at the bottom of the Layers panel. This converts my selection into a layer mask, and we can see that a layer cloak thumbnail has been added to the top layer. Normally, the object operating theatre area that was selected would remain visible in the written document piece everything that was not elite would embody hidden from view, but by holding down the Alt / Option distinguish, I inverted the layer mask, which will vei the sky (the selected expanse) and keep the building (the unselected expanse) visible:

Contraband areas in a layer mask are hidden from view in the document. White areas stay visible.
With the sky in the edifice photo now obscure, the clouds in the pic below IT show through in the document:
If you don't like the endure in Photoshop, just now hold a few minutes. It'll change.
Removing A Selection
In the example to a higher place, the selection outline disappeared when we converted IT to a level mask, but normally, when you're done with a selection created with the Polygonal Lasso Tool, you pot remove it by active skyward to the Select menu at the crown of the screen and choosing Deselect, or you hindquarters press the keyboard shortcut Ctrl+D (Win) / Command+D (Mack). You can also simply get through anywhere privileged of the document with the Polygonal Roland de Lassus Tool or with any of Photoshop's other excerption tools.
Other Stuff
© 2022 Photoshop Essentials.com.
For inspiration, non duplication.
Site design by Steve Patterson.
Photoshop is a trademark of Adobe brick Systems Inc.
How to Draw a Straight Line With Lasso Tool
Source: https://www.photoshopessentials.com/basics/selections/polygonal-lasso-tool/
0 Response to "How to Draw a Straight Line With Lasso Tool"
Post a Comment